The Latest from Bird Crafts |

- "Spring Flowers" Bridal Shower: A Pink and Yellow Dessert Table + FREE Printables!
- I'm Martha Stewart's Dreamers into Doers - Doer of The Week!!!!
- TUTORIAL: Cute, Pink, Ponytail Pops Party Favors!
| "Spring Flowers" Bridal Shower: A Pink and Yellow Dessert Table + FREE Printables! Posted: 12 May 2011 05:14 AM PDT When I was asked by Get Married to design some Bridal Shower printables, I immediately thought "Spring"! :) I'm posting the photos I took for the Get Married site in the hope it might inspire you for your own celebrations, bridal shower or a simple but cute outdoors birthday party! Details below...  I've been wanting to do a really girly collection for a while with soft pastel pinks and yellows ever since I saw this stunning party by Pen 'N Paper Flowers a while back, and this was the perfect opportunity!   I used my daughter's dressing table outside, and a canopy net from when she was a baby for an easy but really cute mini-desserts table. The net was actually a heaven-sent, because you can close it around the table and avoid all the annoying little bugs and mosquito getting near your sweets! :) Cupcakes topped with vanilla butter-cream and fondant flowers similar to the post I showed you here, and homemade coconut creme (recipe here), topped with sprinkles in the color of the party, all helped to bring touches of pink and yellow to the table!  Pink meringues filled with lemon curd provided a sweet treat in the colors of the party! That's what I call a happy marriage!! :) For drinks I'd suggest a choice of pink and regular, homemade lemonade. Sweet treats, pink draguées and lemon sours in cute candy jars (from my local "dollar" store, 3 for $1) make for the perfect, easy party favors - I printed the favor tags in clear, label paper for a nice shear effect! The food here is as much a part of the decor as the DIY pomanders, displayed in a glass cloche. I used a glass candlestick to raise the cloche plateau and add a little height to the mini desserts table. 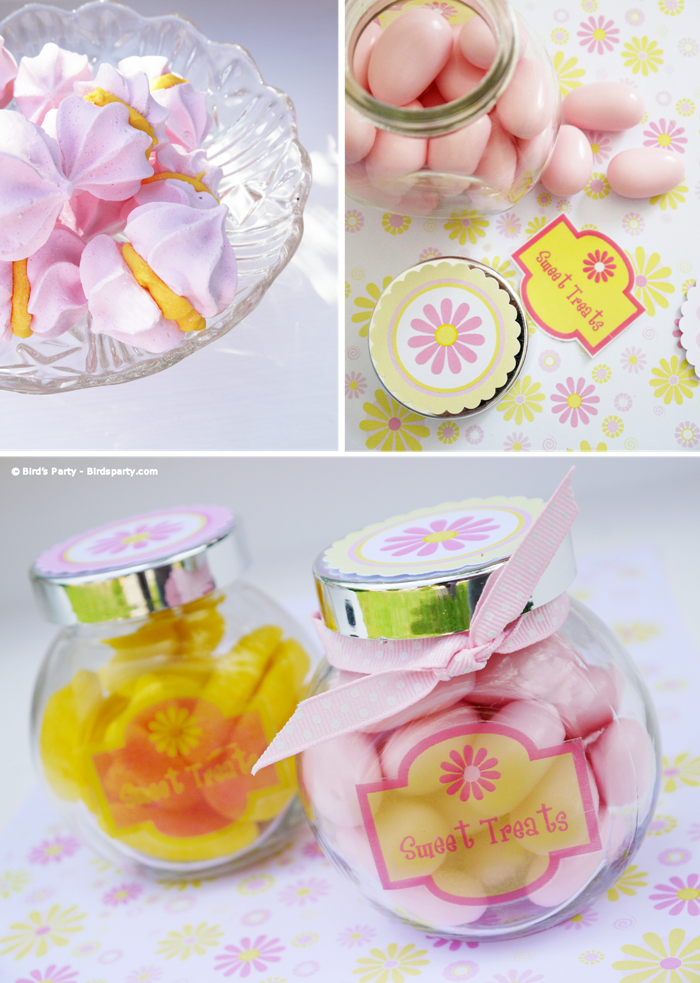  Some of the printables and DIY party tutorials from this Spring Flowers Bridal Shower collection are available for FREE on the Get Married Website every Friday this month, so don't forget to check in with them tomorrow! ;) |
| I'm Martha Stewart's Dreamers into Doers - Doer of The Week!!!! Posted: 11 May 2011 10:18 AM PDT Beyond amazed, delighted, excited, thrilled and utterly grateful to be Martha Stewart's Dreamers into Doers - Doer of the Week!! Check out my interview here - Woo-Hoo!! :)  |
| TUTORIAL: Cute, Pink, Ponytail Pops Party Favors! Posted: 11 May 2011 07:04 AM PDT If you don't like cuteness, pink, pops and girly stuff, then look away now! Today's fabulous tutorial is courtesy of the talented Sheila from Just Wright Candy Buffets! I met Sheila through Bird's Party Facebook fan page and I'm beyond delighted that she agreed to share this really fun tutorial with us here on the blog! Following on from yesterday's Pink Garden Party post, I think this would make a really rather fabulous party favor for any girly party, don't you agree? :) 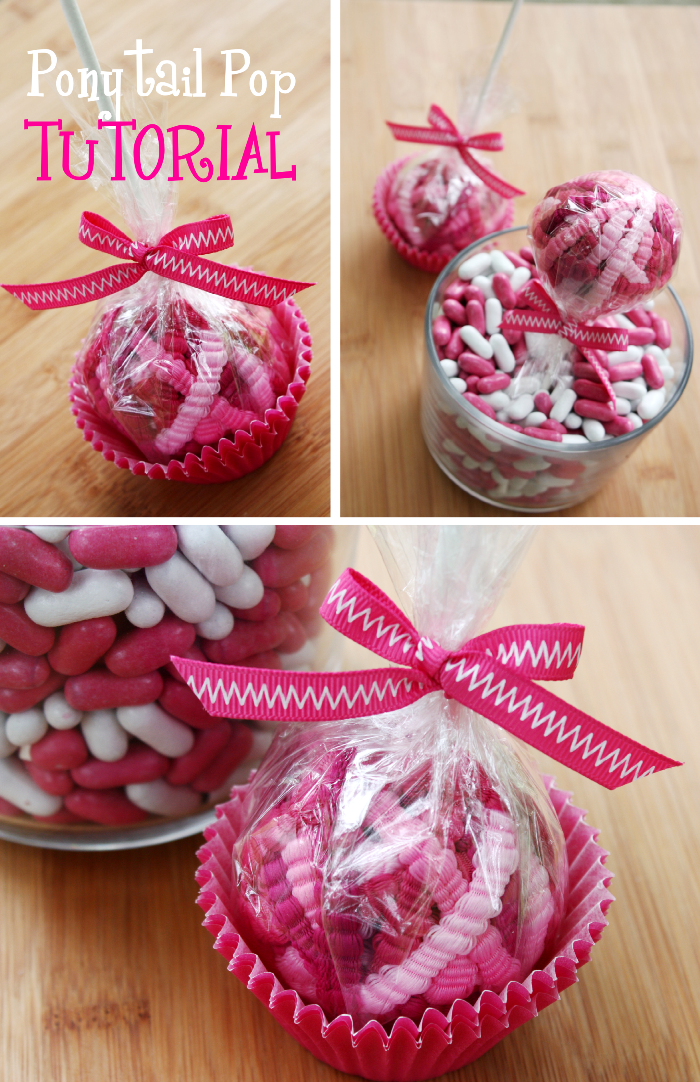 Hello fellow Bird's Party fans!! I'm Sheila, from Just Wright Candy Buffets. It's a pleasure to meet you and I'm honored that Bird asked me to share my method of creating Ponytail Pops with you. This idea came about from a client's request for a non-candy party favor for her daughter's birthday party and the general idea came from this photo below. To make these adorable pops, you'll need the following items: 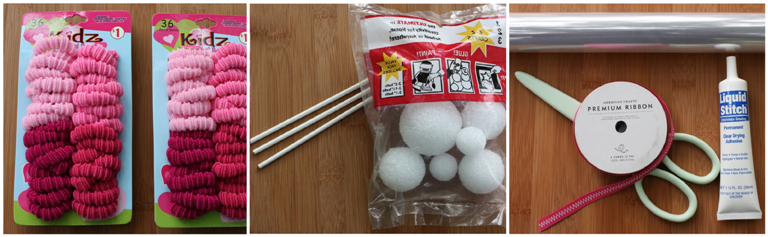 * Ponytail Holders * Styrofoam Balls * Lollipop Sticks * Craft Glue * Scissors * Clear Gift Wrap * Ribbon Let's get started creating our Ponytail Pops!! The packet of Styrofoam balls had three sizes and I elected to use the largest one, measuring two inches (approximately five centimeters). Group the ponytail holders to include one of each shade to ensure even color distribution.   1. Place the first band around the ball 2. Continue adding bands, until it looks like this and the ball is covered. 5. Insert stick into ball, then remove stick and add glue to tip. 7. Reinsert stick and allow glue to dry a minute or so. 8. Grab your roll of clear wrap and cut into squares. The size depends on the size of your pop, but makes sure it's large enough to cover it while leaving a little overhang. 9. Pull all ends of clear wrap towards stick, then cut ribbon and tie ribbon around twisted plastic. Length of ribbon is up to you based on the size bow you want to create. And you have Ponytail Pops!! You can also view a video tutorial on Sheila's Blog here. Thanks so much Sheila for sharing you genius idea with us!! And if you too have a fabulous party tutorial, it would be a shame to keep it to yourself - So come share it here! :) |


| You are subscribed to email updates from Bird's Party Blog To stop receiving these emails, you may unsubscribe now. | Email delivery powered by Google |
| Google Inc., 20 West Kinzie, Chicago IL USA 60610 | |
No comments:
Post a Comment